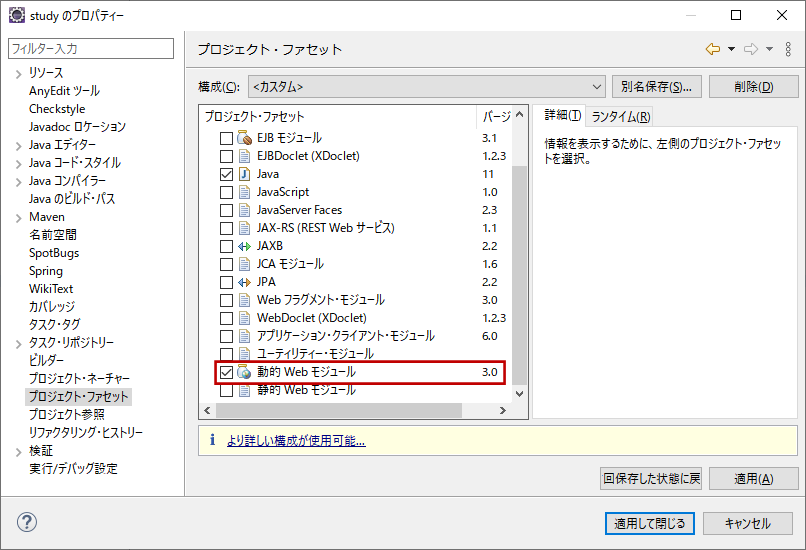
1.画面遷移(GET、POST)
Springでの画面遷移は、Controllerのメソッドに@RequestMappingを設定します。フォーム送信時のGET/POSTはアノテーションのパラメータで指定します。
@Controller
public class HogeController {

	@RequestMapping(value = "/hoge/input", method = RequestMethod.GET)
	public String input(Model model) {
		return "hoge/input";
	}

	@RequestMapping(value = "/hoge/confirm", method = RequestMethod.POST)
	public String confirm(Model model) {
		return "hoge/confirm";
	}
}
ThymeleafでのURL指定例は以下の通りです。
<a th:href="@{/hoge/input}">
<form th:action="@{/hoge/confirm}" method="post">
2.パラメータの受け渡し(フォーム)
画面間のパラメータ受け渡しは、アクションフォームを介して行います。
アクションフォームを作成し、フィールドを追加します。Thymeleafの仕様により、getter/setterは必須となります。
public class HogeForm implements Serializable {

	private String hogeName;

	public String getHogeName() {
		return hogeName;
	}

	public void setHogeName(String hogeName) {
		this.hogeName = hogeName;
	}
}
メソッドの引数にアクションフォームを追加します。アクションフォームには@ModelAttributeを設定します。
@Controller
public class HogeController {

	@RequestMapping(value = "/hoge/input", method = RequestMethod.GET)
	public String input(@ModelAttribute HogeForm form, Model model) {
		return "hoge/input";
	}

	@RequestMapping(value = "/hoge/confirm", method = RequestMethod.POST)
	public String confirm(@ModelAttribute HogeForm form, Model model) {
		return "hoge/confirm";
	}
}
3.入力チェック(バリデーション)
SpringでのバリデーションはBean Validationを使用して実装するのが一般的です。
まずはBean ValidationおよびHibernate Validatorを使用するため、pom.xmlに定義を追加します。
<project xmlns="http://maven.apache.org/POM/4.0.0" xmlns:xsi="http://www.w3.org/2001/XMLSchema-instance" xsi:schemaLocation="http://maven.apache.org/POM/4.0.0 https://maven.apache.org/xsd/maven-4.0.0.xsd">
  <modelVersion>4.0.0</modelVersion>
  <groupId>org.miyadai.app</groupId>
  <artifactId>study-spring</artifactId>
  <version>0.0.1-SNAPSHOT</version>
  <properties>
            :
    <!-- Bean Validation API version -->
    <validation-api.version>2.0.1.Final</validation-api.version>
    <!-- Hibernate Validator version -->
    <hibernate-validator.version>5.3.4.Final</hibernate-validator.version>
            :
  </properties>
  <dependencies>
            :
    <!-- Bean Validation API -->
    <dependency>
      <groupId>javax.validation</groupId>
      <artifactId>validation-api</artifactId>
      <version>${validation-api.version}</version>
    </dependency>
    <!-- Hibernate Validator -->
    <dependency>
      <groupId>org.hibernate</groupId>
      <artifactId>hibernate-validator</artifactId>
      <version>${hibernate-validator.version}</version>
    </dependency>
            :
  </dependencies>
</project>
アクションフォームの各フィールドにアノテーションを設定することでチェックを追加します。
public class HogeForm implements Serializable {

	@NotBlank
	@Size(min = 1, max = 256)
	private String hogeName;

	public String getHogeName() {
		return hogeName;
	}

	public void setHogeName(String hogeName) {
		this.hogeName = hogeName;
	}
}
コントローラのメソッド引数のアクションフォームに@Validatedを設定し、さらにチェック結果を取得するための引数を追加します。また、チェック結果を判定し、表示する画面を切り替えるなどの処理を追加します。
@Controller
public class HogeController {

	@RequestMapping(value = "/hoge/input", method = RequestMethod.GET)
	public String input(@ModelAttribute HogeForm form, Model model) {
		return "hoge/input";
	}

	@RequestMapping(value = "/hoge/confirm", method = RequestMethod.POST)
	public String confirm(
			@ModelAttribute @Validated HogeForm form, BindingResult result, Model model) {

		if (result.hasErrors()) {
			return input(form, model);
		}

		return "hoge/confirm";
	}
}
HTML(Thymeleaf)ではエラーメッセージを表示させる処理を記述します。
<form th:action="@{/hoge/confirm}" th:object="${hogeForm}" method="post">
    <input type="text" th:field="*{hogeName}">
    <p th:if="${#fields.hasErrors('hogeName')}" th:errors="*{hogeName}"></p>
</form>
メッセージを日本語化及びカスタマイズするため、WebMvcで使用するバリデータをオーバーライドします。
@Configuration
@EnableWebMvc
public class AppConfig implements WebMvcConfigurer {
@Bean
public MessageSource messageSource() {
ReloadableResourceBundleMessageSource messageSource = new ReloadableResourceBundleMessageSource();
// ValidationMessage.propertiesを使用
messageSource.setBasename("classpath:ValidationMessages");
// メッセージプロパティの文字コードを指定
messageSource.setDefaultEncoding("UTF-8");
return messageSource;
}
@Bean
public LocalValidatorFactoryBean validator() {
LocalValidatorFactoryBean localValidatorFactoryBean = new LocalValidatorFactoryBean();
localValidatorFactoryBean.setValidationMessageSource(messageSource());
return localValidatorFactoryBean;
}
@Override
public Validator getValidator() {
return validator();
}
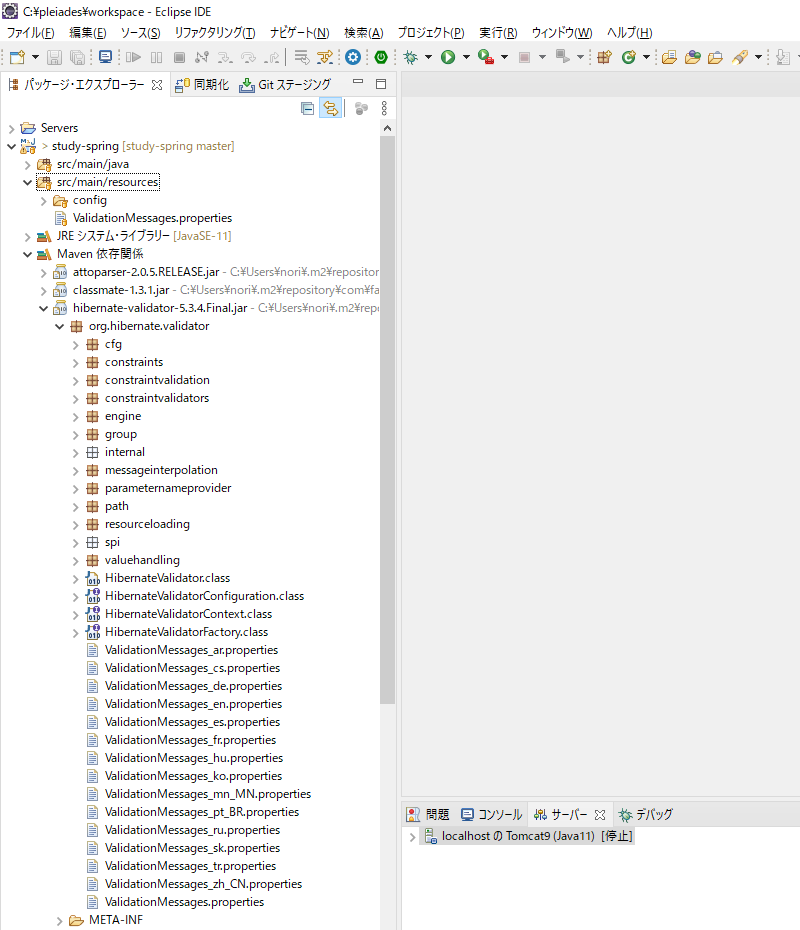
}hibernate-validator-x.x.x.Final.jar内に含まれるValidationMessages.propertiesを取り出し、src/main/resources配下にコピーします。
メッセージを適宜日本語化し、メッセージに埋め込むフィールド名も定義します。メッセージ内の{0}の部分にフィールド名を差し込むことができます。
# Message.

javax.validation.constraints.AssertFalse.message = must be false
javax.validation.constraints.AssertTrue.message  = must be true
javax.validation.constraints.DecimalMax.message  = must be less than ${inclusive == true ? 'or equal to ' : ''}{value}
javax.validation.constraints.DecimalMin.message  = must be greater than ${inclusive == true ? 'or equal to ' : ''}{value}
javax.validation.constraints.Digits.message      = numeric value out of bounds (<{integer} digits>.<{fraction} digits> expected)
javax.validation.constraints.Future.message      = must be in the future
javax.validation.constraints.Max.message         = must be less than or equal to {value}
javax.validation.constraints.Min.message         = must be greater than or equal to {value}
javax.validation.constraints.NotNull.message     = may not be null
javax.validation.constraints.Null.message        = must be null
javax.validation.constraints.Past.message        = must be in the past
javax.validation.constraints.Pattern.message     = {0}には不正な値が設定されています。
javax.validation.constraints.Size.message        = {0}は{min}文字以上、{max}文字以内で入力してください。

org.hibernate.validator.constraints.CreditCardNumber.message        = invalid credit card number
org.hibernate.validator.constraints.EAN.message                   = invalid {type} barcode
org.hibernate.validator.constraints.Email.message                   = not a well-formed email address
org.hibernate.validator.constraints.Length.message                  = length must be between {min} and {max}
org.hibernate.validator.constraints.LuhnCheck.message               = The check digit for ${validatedValue} is invalid, Luhn Modulo 10 checksum failed
org.hibernate.validator.constraints.Mod10Check.message              = The check digit for ${validatedValue} is invalid, Modulo 10 checksum failed
org.hibernate.validator.constraints.Mod11Check.message              = The check digit for ${validatedValue} is invalid, Modulo 11 checksum failed
org.hibernate.validator.constraints.ModCheck.message                = The check digit for ${validatedValue} is invalid, ${modType} checksum failed
org.hibernate.validator.constraints.NotBlank.message                = {0}を入力してください。
org.hibernate.validator.constraints.NotEmpty.message                = {0}を入力してください。
org.hibernate.validator.constraints.ParametersScriptAssert.message  = script expression "{script}" didn't evaluate to true
org.hibernate.validator.constraints.Range.message                   = must be between {min} and {max}
org.hibernate.validator.constraints.SafeHtml.message                = may have unsafe html content
org.hibernate.validator.constraints.ScriptAssert.message            = script expression "{script}" didn't evaluate to true
org.hibernate.validator.constraints.URL.message                     = must be a valid URL

org.hibernate.validator.constraints.br.CNPJ.message                 = invalid Brazilian corporate taxpayer registry number (CNPJ)
org.hibernate.validator.constraints.br.CPF.message                  = invalid Brazilian individual taxpayer registry number (CPF)
org.hibernate.validator.constraints.br.TituloEleitoral.message      = invalid Brazilian Voter ID card number

# Field Name.
hogeName=ほげ名
4.例外処理(エラー画面制御)
Webシステムで予期せぬエラーが発生した場合、デフォルトのエラー画面ではセキュリティ上脆弱となるため、エラー画面はカスタマイズする必要があります。
デフォルトのエラー画面では、アプリケーションサーバのバージョンが表示されているケースがあり、攻撃者はこのバージョンのアプリケーションサーバの脆弱性をついて攻撃することができてしまいます。
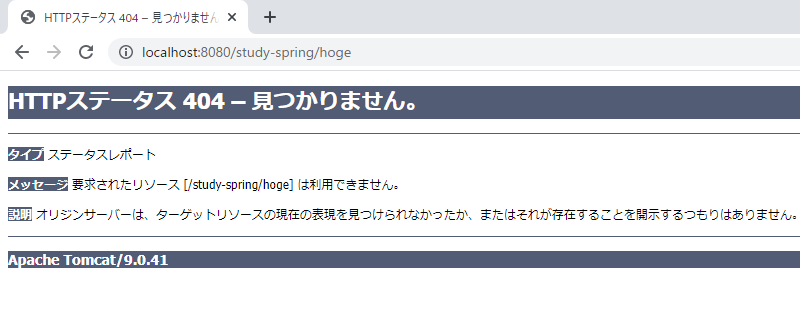
web.xmlのエラーページ設定でエラー時のURLを定義し、URLに応じたページを用意することでエラー画面をカスタマイズすることが可能です。
<?xml version="1.0" encoding="UTF-8"?>
<web-app xmlns="http://xmlns.jcp.org/xml/ns/javaee"
         xmlns:xsi="http://www.w3.org/2001/XMLSchema-instance"
         xsi:schemaLocation="http://xmlns.jcp.org/xml/ns/javaee http://xmlns.jcp.org/xml/ns/javaee/web-app_4_0.xsd"
         version="4.0">
        :
  <error-page>
    <location>/errors</location>
  </error-page>
</web-app>
コントローラではエラー時のURLに沿ったRequestMappingを設定します。
@Controller
public class ErrorController {

	@RequestMapping(value = "errors", method = RequestMethod.GET)
	public String renderErrorPage() {
		return "error";
	}
}
エラー画面用のHTML(Thymeleaf)を用意します。
<!DOCTYPE html>
<html lang="ja" xmlns:th="http://www.thymeleaf.org">
  <head>
    <meta charset="utf-8">
    <title>エラー</title>
  </head>
  <body>
    <h1>エラー</h1>
    <h3>予期せぬエラーが発生しました。</h3>
    <p>しばらく経ってから再度アクセスしてください。<br>
    問題が解消しない場合は、管理者までご連絡ください。</p>
    <a th:href="@{/}">トップへ戻る</a>
  </body>
</html>