1.はじめに
以下の通り、開発環境を構築します(まずは★の部分のみ構築します)。
- OS:Windows10 Home 64bit
- Pleiades All in One Eclipse 2020-12 (4.18.0) ★
- OpenJDK
- Tomcat 9.0.41
- Maven 3.6
- Spring ★
- Spring Framework 5.2.4.RELEASE
- Spring WebMVC 5.2.4.RELEASE
- View Engine ★
- Thymeleaf 3.0.11.RELEASE
- Database
- PostgreSQL
- MyBatis
- Logging
- Logback
- Test
- JUnit
2.Eclipseのインストール
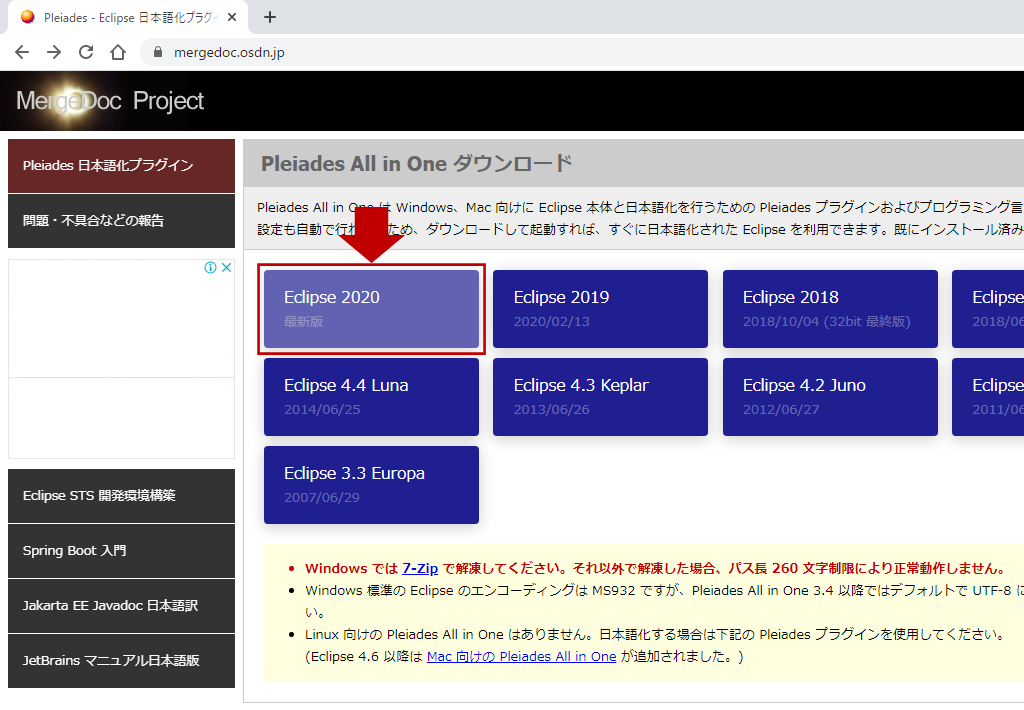
Pleiades 日本語プラグインのサイト(https://mergedoc.osdn.jp/)にアクセスし、Pleiades All in Oneをダウンロードします。
(1) サイトにアクセスしたら「Eclipse 2020」をクリックします。
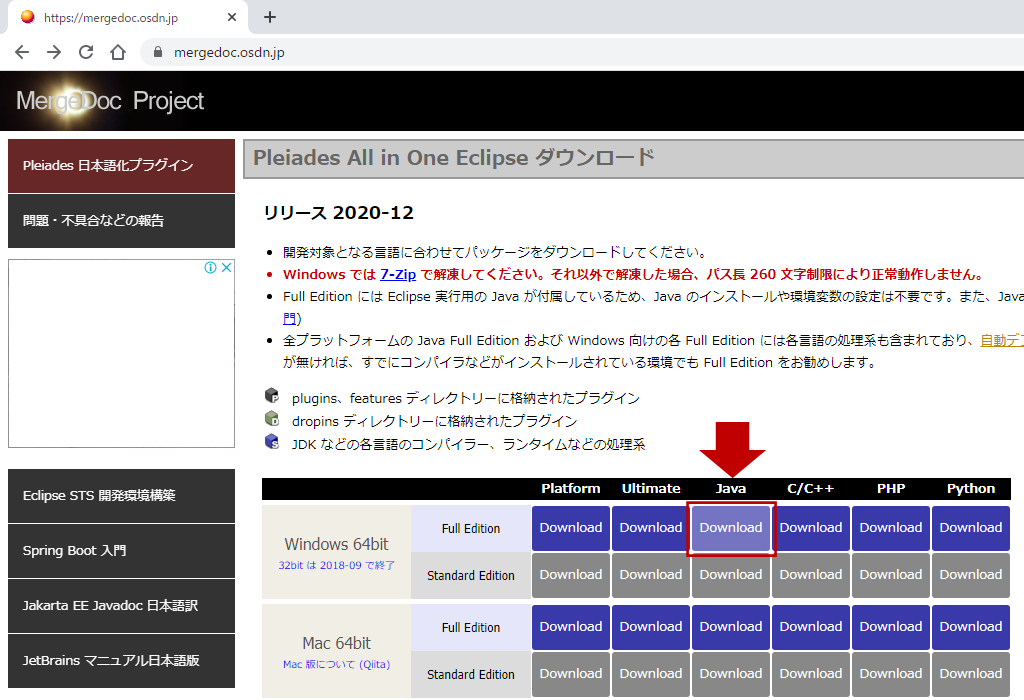
(2) Windows 64bitのJava、Full Editionをクリックします。
(3) ダウンロードしたzipファイルを任意の場所に解凍します。
3.mavenプロジェクトの作成
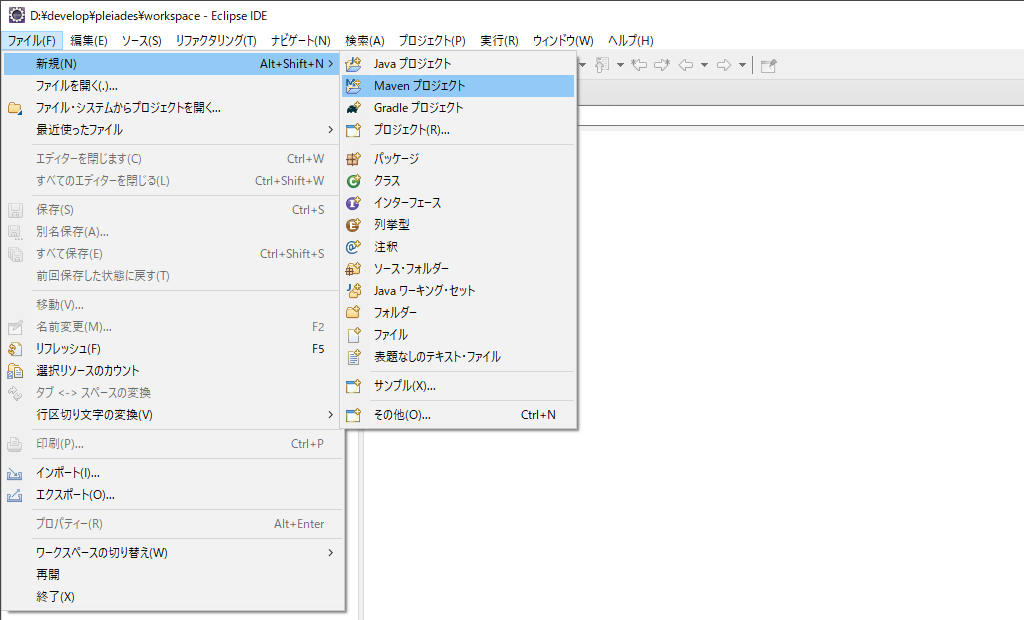
(1) Eclipseを起動し、メニューから「ファイル」→「新規」→「Maven プロジェクト」を選択します。
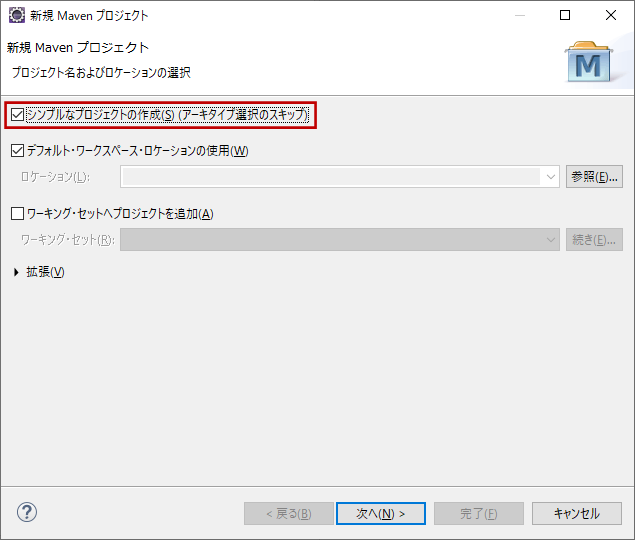
(2) 新規 Maven プロジェクトダイアログで「シンプルなプロジェクトの作成」をチェックし、次へボタンをクリックします。
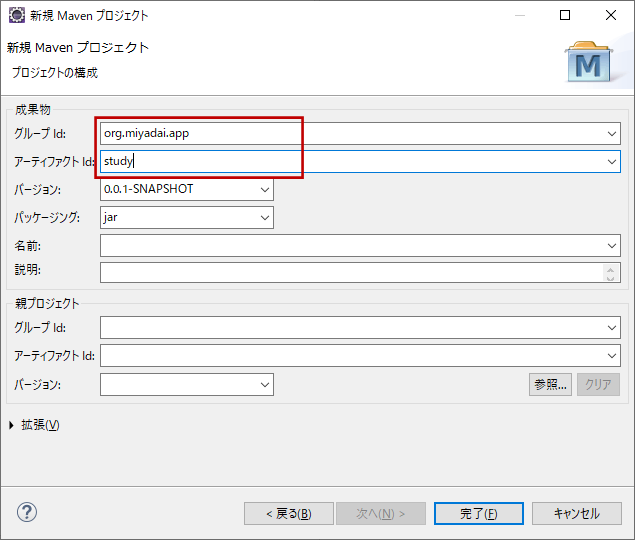
(3) グループId(Javaパッケージ)、アーティファクトId(プロジェクト名)を入力し、完了ボタンをクリックします。
4.pom.xmlの編集
(1) pom.xmlを開き、ソースのエンコーディング、コンパイルJavaバージョンを指定します。各ライブラリのバージョンも定義しておきます。
<properties>
  <!-- Generic properties -->
  <project.build.sourceEncoding>UTF-8</project.build.sourceEncoding>
  <maven.compiler.source>11</maven.compiler.source>
  <maven.compiler.target>11</maven.compiler.target>
  <!-- Servlet version -->
  <servlet.version>4.0.1</servlet.version>
  <!-- Spring framework version -->
  <spring-framework.version>5.2.4.RELEASE</spring-framework.version>
  <!-- Thymeleaf -->
  <thymeleaf.version>3.0.11.RELEASE</thymeleaf.version>
</properties>
(2) 続いて、Spring MVCに必要なJarファイルの依存関係をdependenciesディレクティブの中に定義します。
<dependencies>
  <!-- Servlet -->
  <dependency>
    <groupId>javax.servlet</groupId>
      <artifactId>javax.servlet-api</artifactId>
      <version>${servlet.version}</version>
      <!-- コンパイル時のみ依存 -->
      <!-- 実行時はTomcatライブラリを使用するため -->
      <scope>provided</scope>
  </dependency>
  <!-- Spring MVC -->
  <dependency>
    <groupId>org.springframework</groupId>
    <artifactId>spring-webmvc</artifactId>
    <version>${spring-framework.version}</version>
  </dependency>
</dependencies>
(3) 次に、Thymeleafに必要なJarファイルの依存関係をdependenciesディレクティブの中に定義します。
<!-- Thymeleaf -->
<dependency>
<groupId>org.thymeleaf</groupId>
<artifactId>thymeleaf</artifactId>
<version>${thymeleaf.version}</version>
</dependency>
<dependency>
<groupId>org.thymeleaf</groupId>
<artifactId>thymeleaf-spring5</artifactId>
<version>${thymeleaf.version}</version>
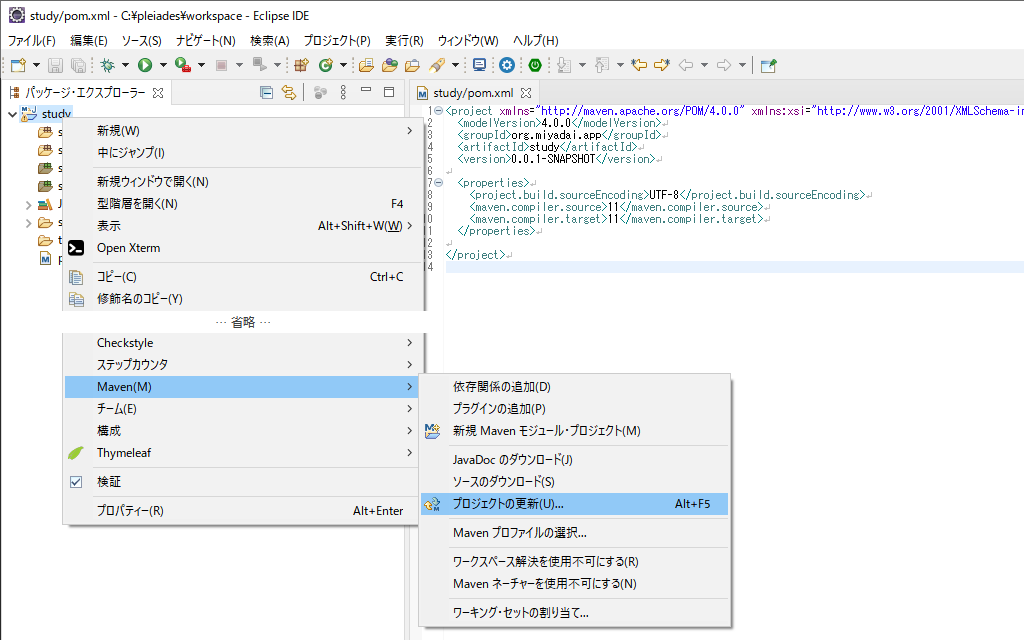
</dependency>(4) pom.xmlの編集か完了したら、変更を保存し、プロジェクトの上で右クリック、「Maven」→「プロジェクトの更新」をクリックします。
(5) Maven プロジェクトの更新ダイアログが表示されたらOKボタンをクリックします。

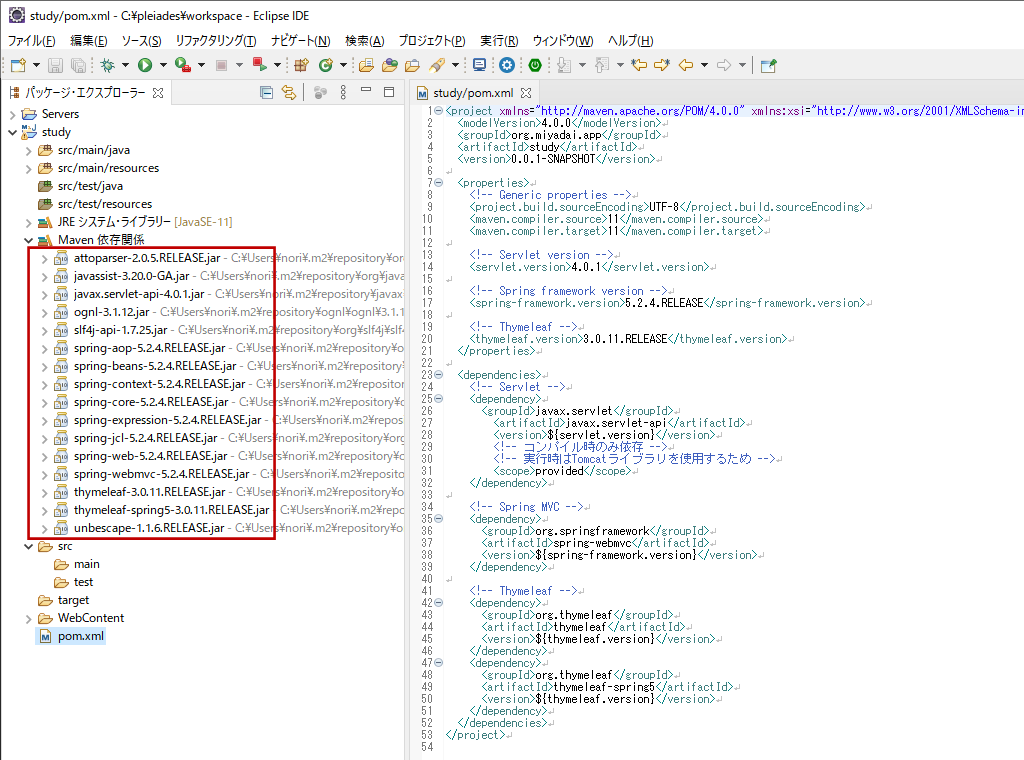
(6) Maven 依存関係に定義したSpring MVC関連のライブラリが追加されます。
5.HelloWorldプログラムの作成
5-1.Bean定義ファイルの作成
(1) src/main/resourcesフォルダ配下にconfigフォルダを作成し、「spring.xml」を作成します。
(2) spring.xmlにビジネスロジックのBean定義を記述します。
※HelloWorldプログラムではビジネスロジックは不要なので、空の定義にします。
<?xml version="1.0" encoding="UTF-8"?>
<beans xmlns="http://www.springframework.org/schema/beans"
       xmlns:xsi="http://www.w3.org/2001/XMLSchema-instance"
       xsi:schemaLocation="http://www.springframework.org/schema/beans
           http://www.springframework.org/schema/beans/spring-beans-2.5.xsd">
</beans>
(3) configフォルダ配下に「spring-mvc.xml」を作成します。
(4) spring-mvc.xmlにプレゼンテーション層のBean定義を記述します。
<?xml version="1.0" encoding="UTF-8"?>
<beans xmlns="http://www.springframework.org/schema/beans"
    xmlns:xsi="http://www.w3.org/2001/XMLSchema-instance" xmlns:context="http://www.springframework.org/schema/context"
    xmlns:mvc="http://www.springframework.org/schema/mvc" xmlns:util="http://www.springframework.org/schema/util"
    xmlns:aop="http://www.springframework.org/schema/aop"
    xsi:schemaLocation="http://www.springframework.org/schema/mvc http://www.springframework.org/schema/mvc/spring-mvc-4.3.xsd
        http://www.springframework.org/schema/beans http://www.springframework.org/schema/beans/spring-beans-4.3.xsd
        http://www.springframework.org/schema/util http://www.springframework.org/schema/util/spring-util-4.3.xsd
        http://www.springframework.org/schema/context http://www.springframework.org/schema/context/spring-context-4.3.xsd
        http://www.springframework.org/schema/aop http://www.springframework.org/schema/aop/spring-aop-4.3.xsd">
  <!-- Spring MVCの使用を宣言 -->
  <mvc:annotation-driven />
  <!-- Beanクラスが格納されるパッケージのルートを宣言 -->
  <context:component-scan base-package="org.miyadai.app.common" />
  <context:component-scan base-package="org.miyadai.app.study" />
</beans>
5-2.コントローラの作成
(1) src/main/javaフォルダ配下にパッケージ「org.miyadai.app.study.controller」を作成します。
(2) 作成したパッケージ配下に「TopController.java」を作成します。
package org.miyadai.app.study.controller;
import org.springframework.stereotype.Controller;
import org.springframework.web.bind.annotation.RequestMapping;
import org.springframework.web.bind.annotation.RequestMethod;
import org.springframework.web.servlet.ModelAndView;
@Controller
public class TopController {
  @RequestMapping(value = "/", method = RequestMethod.GET)
  public ModelAndView top(ModelAndView model) {
    model.setViewName("top");
    model.addObject("message", "Hello World!!");
    return model;
  }
}
5-3.ビューの作成
(1) パッケージ「org.miyadai.app.common.config」を作成し、作成したパッケージ配下に「ThymeleafConfig.java」を作成します。
package org.miyadai.app.common.config;
import org.springframework.context.annotation.Bean;
import org.springframework.context.annotation.Configuration;
import org.springframework.web.servlet.ViewResolver;
import org.thymeleaf.spring5.SpringTemplateEngine;
import org.thymeleaf.spring5.templateresolver.SpringResourceTemplateResolver;
import org.thymeleaf.spring5.view.ThymeleafViewResolver;
import org.thymeleaf.templateresolver.ITemplateResolver;
@Configuration
public class ThymeleafConfig {
  @Bean
  public ITemplateResolver templateResolver() {
    SpringResourceTemplateResolver resolver = new SpringResourceTemplateResolver();
    resolver.setPrefix("/WEB-INF/view/");
    resolver.setSuffix(".html");
    resolver.setTemplateMode("HTML");
    resolver.setCharacterEncoding("UTF-8");
    return resolver;
  }
  @Bean
  public SpringTemplateEngine templateEngine() {
    SpringTemplateEngine templateEngine = new SpringTemplateEngine();
    templateEngine.setTemplateResolver(templateResolver());
    return templateEngine;
  }
  @Bean
  public ViewResolver viewResolver() {
    ThymeleafViewResolver thymeleafViewResolver = new ThymeleafViewResolver();
    thymeleafViewResolver.setTemplateEngine(templateEngine());
    thymeleafViewResolver.setCharacterEncoding("UTF-8");
    return thymeleafViewResolver;
  }
}
(2) プロジェクトフォルダ直下に「WebContent/WEB-INF/view」というフォルダを作成します。
(3) 作成したフォルダ配下に「top.html」を作成します。
<!DOCTYPE html>
<html xmlns:th="http://www.thymeleaf.org">
  <head>
    <meta charset="utf-8">
    <title>Spring サンプル</title>
  </head>
  <body>
    <span th:text="${message}"></span>
  </body>
</html>
5-4.web.xmlの作成
(1) WebContent/WEB-INFフォルダ配下に「web.xml」を作成します。
<?xml version="1.0" encoding="UTF-8"?>
<web-app xmlns="http://xmlns.jcp.org/xml/ns/javaee"
         xmlns:xsi="http://www.w3.org/2001/XMLSchema-instance"
         xsi:schemaLocation="http://xmlns.jcp.org/xml/ns/javaee http://xmlns.jcp.org/xml/ns/javaee/web-app_4_0.xsd"
         version="4.0">
</web-app>
(2) web.xmlにビジネスロジックのBean定義ファイルの定義を追加します。
<!-- ビジネスロジックのBean定義ファイル -->
<context-param>
  <param-name>contextConfigLocation</param-name>
  <param-value>classpath:/config/spring.xml</param-value>
</context-param>
(3) web.xmlにリスナーの定義を追加します。
<!-- リスナーを登録 -->
<listener>
  <listener-class>org.springframework.web.context.ContextLoaderListener</listener-class>
</listener>
(4) web.xmlにエンコーディングフィルタの定義を追加します。
<!-- エンコーディングフィルタ  -->
<filter>
  <filter-name>characterEncodingFilter</filter-name>
  <filter-class>org.springframework.web.filter.CharacterEncodingFilter</filter-class>
  <init-param>
    <param-name>encoding</param-name>
    <param-value>UTF-8</param-value>
  </init-param>
</filter>
<filter-mapping>
  <filter-name>characterEncodingFilter</filter-name>
  <url-pattern>/*</url-pattern>
</filter-mapping>
(5) web.xmlにSpring MVCで処理をするためのディスパッチャーサーブレットの定義を追加します。
<!-- ディスパッチャーサーブレット -->
<servlet>
  <servlet-name>dispatcherServlet</servlet-name>
  <servlet-class>org.springframework.web.servlet.DispatcherServlet</servlet-class>
  <!-- Spring MVCのBean定義ファイル -->
  <init-param>
    <param-name>contextConfigLocation</param-name>
    <param-value>classpath:/config/spring-mvc.xml</param-value>
  </init-param>
</servlet>
<servlet-mapping>
  <servlet-name>dispatcherServlet</servlet-name>
  <url-pattern>/</url-pattern>
</servlet-mapping>
5-5.Webサービスの起動
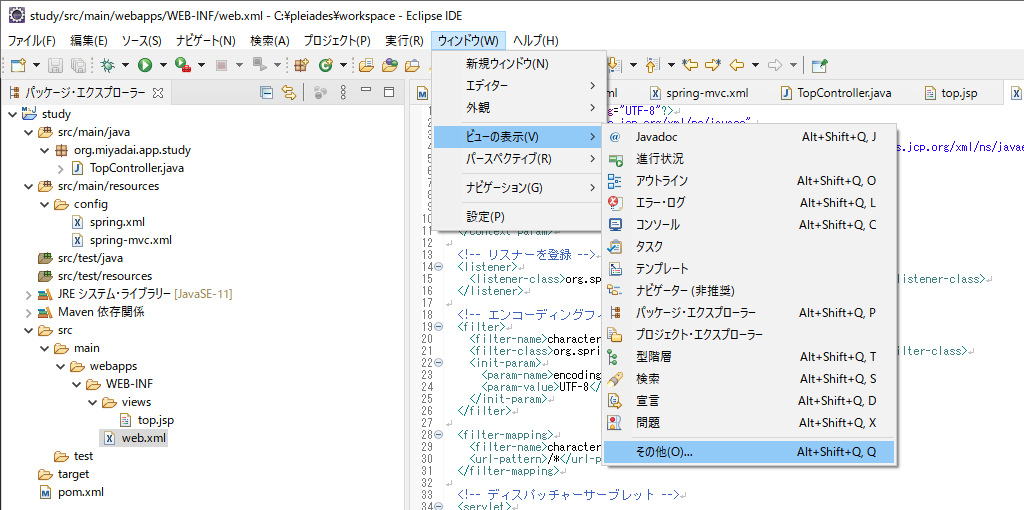
(1) Eclipseにサーバービューを表示させます。「ウィンドウ」→「ビューの表示」→「その他」をクリックしてください。
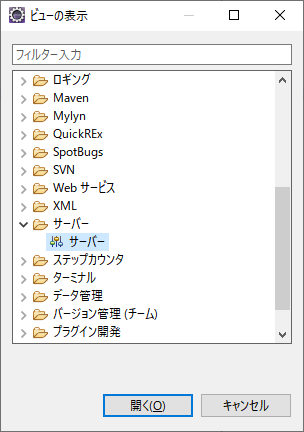
(2) ビューの表示ダイアログで「サーバー」→「サーバー」を選択し、開くボタンをクリックします。
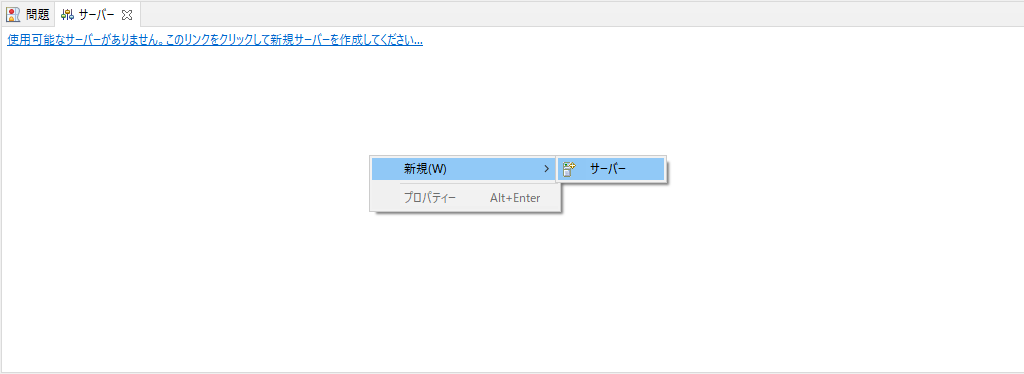
(3) サーバーウィンドウの上で右クリックし、「新規」→「サーバー」を選択してください。
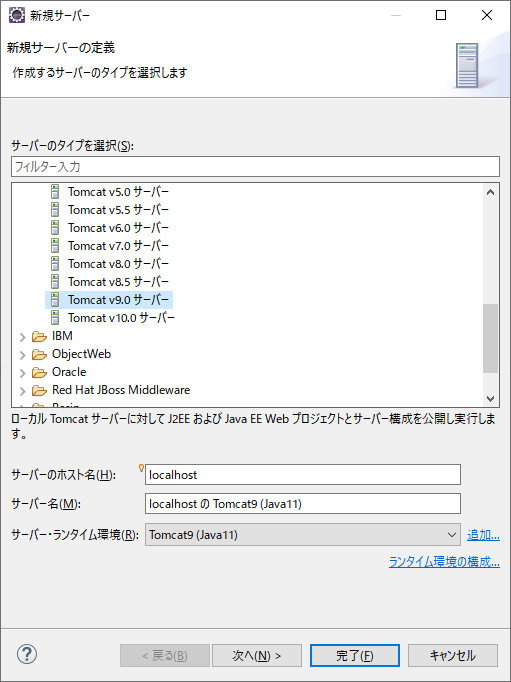
(4) 新規サーバーの定義ダイアログが表示されたら、「Tomcat v9.0 サーバー」を選択し、完了ボタンをクリックします。
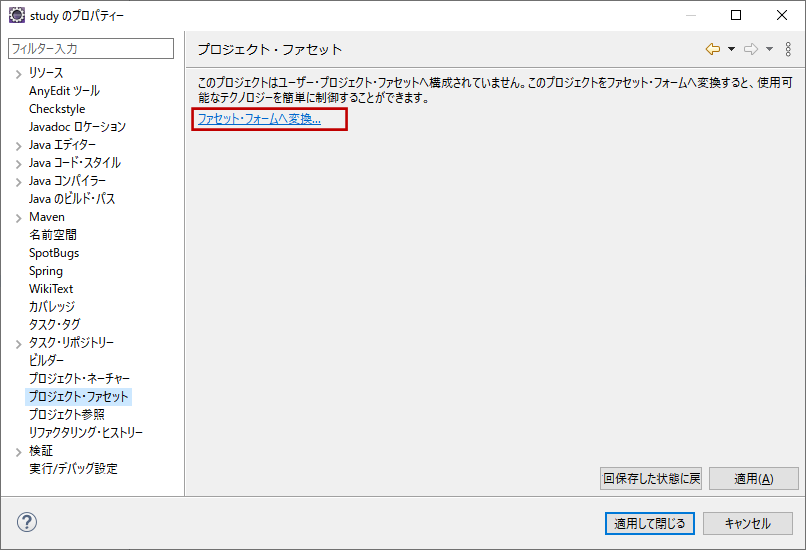
(5) プロジェクトの上で右クリックし、プロパティを選択します。

(6) プロジェクト・ファセットを選択し、「ファセット・フォームへ変換…」をクリックします。
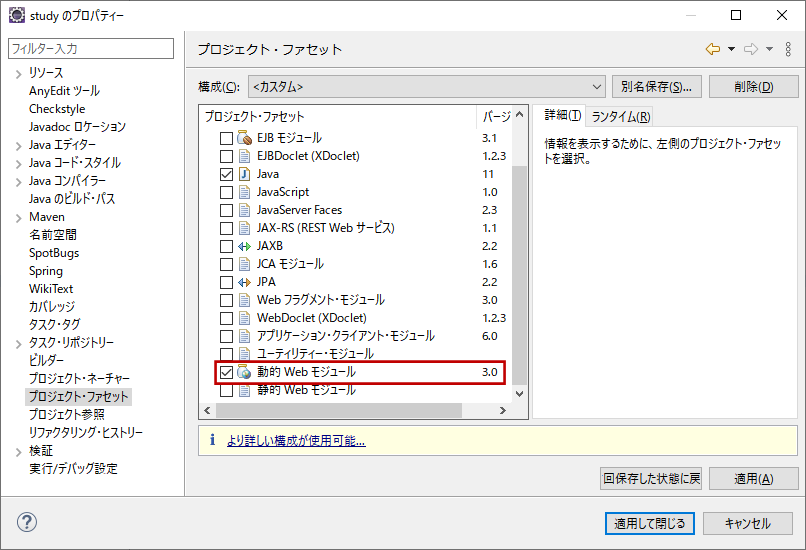
(7) 「動的 Web モジュール」をチェックし、適用して閉じるボタンをクリックします。
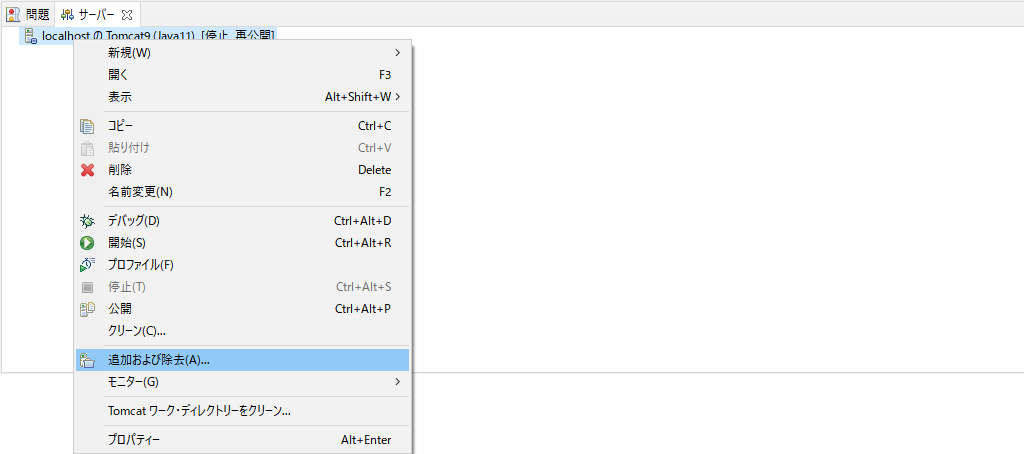
(8) サーバーウィンドウの追加したサーバーの上で右クリックし、「追加および除去」をクリックします。
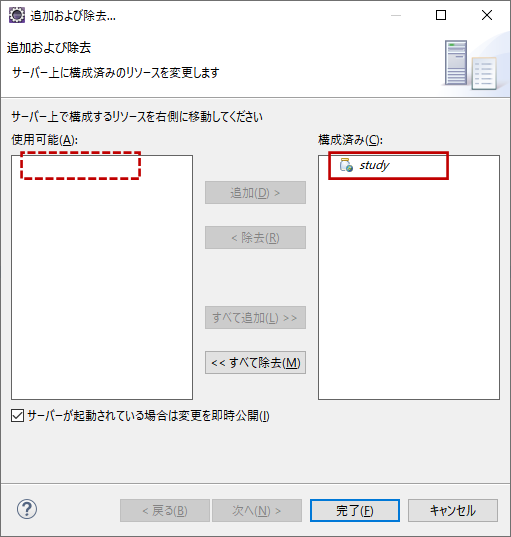
(9) 追加および除去ダイアログが表示されたら、アプリケーションを構成済みに追加し、完了ボタンをクリックします。
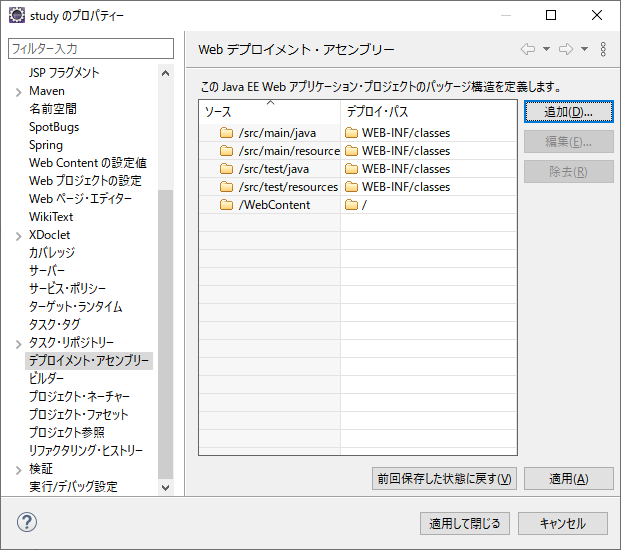
(10) プロジェクトの上で右クリックし、プロパティを選択します。

(11) デプロイメント・アセンブリーを選択し、追加ボタンをクリックします。
(12) ディレクティブ・タイプの選択ダイアログが表示されたら、「Java ビルド・パス・エントリー」を選択し、次へボタンをクリックします。
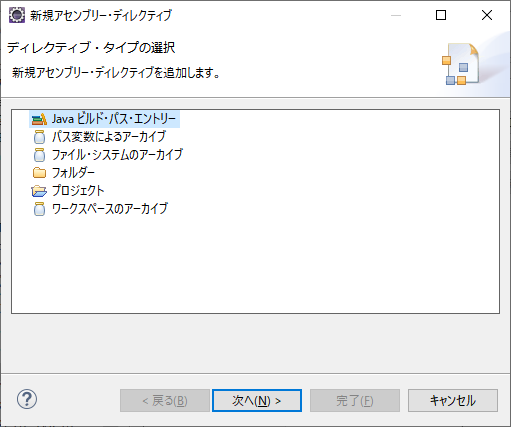
(13) Java ビルド・パス・エントリーダイアログが表示されたら、「Maven 依存関係」を選択し、完了ボタンをクリックします。

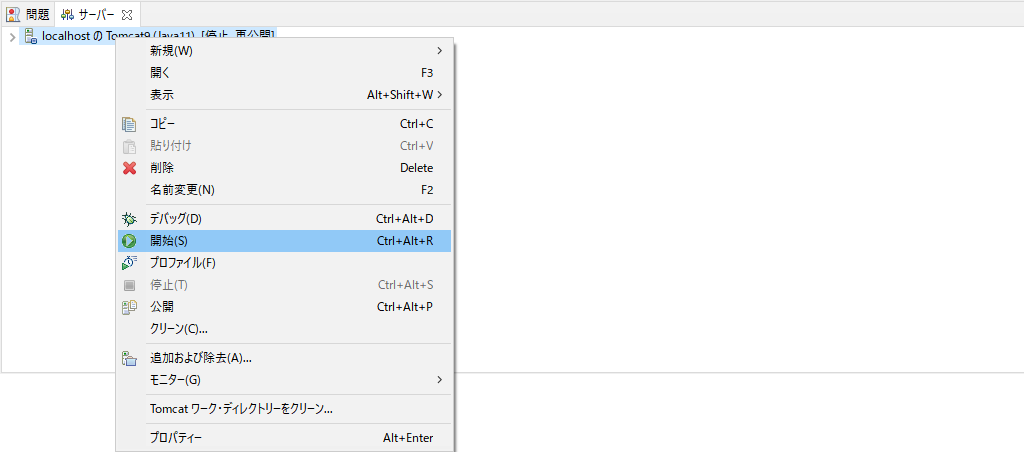
(14) サーバーウィンドウの追加したサーバーの上で右クリックし、「開始」をクリックします。
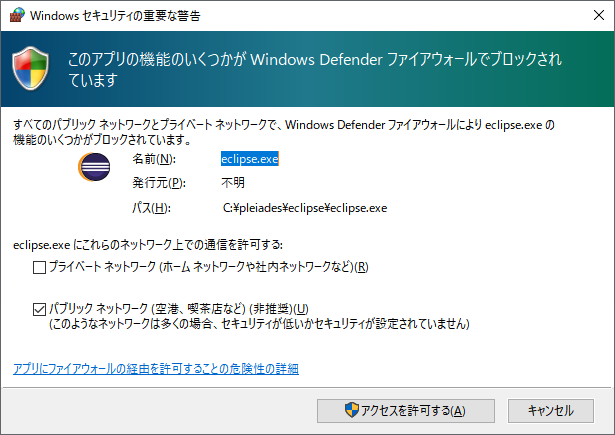
(15) サーバー起動途中でファイアウォールの警告が出たらアクセスを許可するボタンをクリックします。
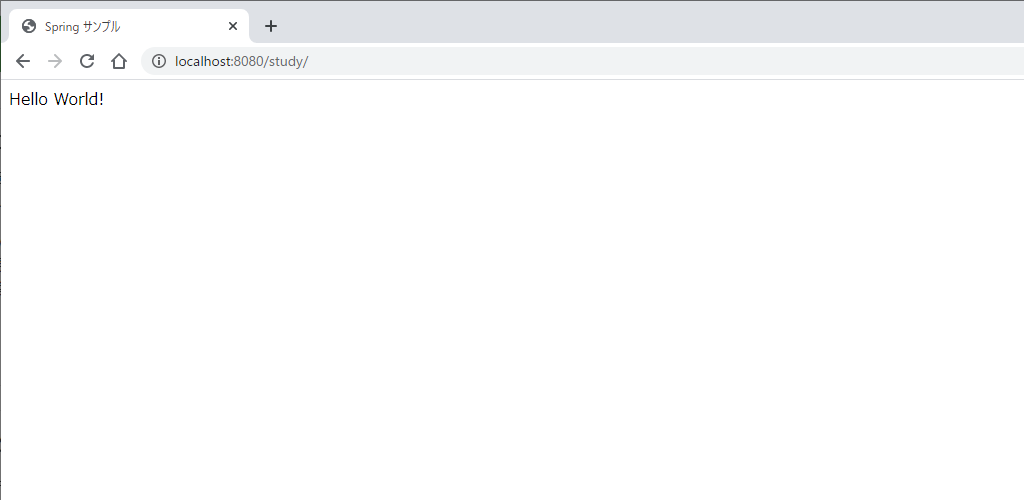
(16) サーバーが起動したら、ブラウザから「http://localhost:8080/study/」にアクセスします。Hello World画面が出たら成功です。